Phone — no network after moving a SIM
Check the line and tray compatibility without cutting the card.
Difficulty
Easy
Time
5–25 min
Cost
—
Symptoms
- phone does not recognise SIM
Possible causes
1Incorrect SIM fit or inactive line
Less likelyThis is a possible explanation, not a confirmed diagnosis. Compare it with the safe checks below.
- Check flight mode and line status with the carrier. Distinguish no SIM from no coverage. Do not disclose PIN or PUK codes.
Initial checks
- Check flight mode and line status with the carrier. Distinguish no SIM from no coverage. Do not disclose PIN or PUK codes.
- Switch off. If permitted, remove the tray using the specified tool and check SIM size and orientation. Do not use a loose adapter.
- Insert without force and restart. Check connection status. For eSIM follow carrier instructions without deleting the profile as a test.
Step-by-step repair instructions
- 1
Prepare a safe place
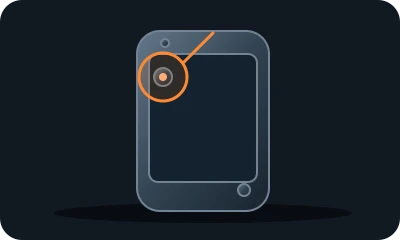
Reference diagram. The marker shows an example inspection area. Follow your model's manual. 
Conceptual illustration. Follow the text and your model's manual. Find the manual and model identifier. Photograph the initial condition. Start with reversible checks that do not open the casing or require force.
Expected result: You understand the model instructions and can safely perform the listed tasks.
About 3 min
Stop if: The model, access or safe preparation is unclear.
- 2
Check line status
Reference diagram. The marker shows an example inspection area. Follow your model's manual. Conceptual illustration. Follow the text and your model's manual. Check flight mode and line status with the carrier. Distinguish no SIM from no coverage. Do not disclose PIN or PUK codes.
Expected result: You know the exact message.
About 4 min
Stop if: The phone requests a PUK or another code attempt.
- 3
Check tray fit
Reference diagram. The marker shows an example inspection area. Follow your model's manual. 
Conceptual illustration. Follow the text and your model's manual. Switch off. If permitted, remove the tray using the specified tool and check SIM size and orientation. Do not use a loose adapter.
Expected result: The SIM lies flat in the correct tray.
About 4 min
Stop if: The tray jams or SIM is damaged.
- 4
Restart and check the carrier
Reference diagram. The marker shows an example inspection area. Follow your model's manual. 
Conceptual illustration. Follow the text and your model's manual. Insert without force and restart. Check connection status. For eSIM follow carrier instructions without deleting the profile as a test.
Expected result: The phone detects the active line.
About 4 min
Stop if: The message persists after correct seating.
- 5
Check the outcome and save your notes
Reference diagram. The marker shows an example inspection area. Follow your model's manual. 
Conceptual illustration. Follow the text and your model's manual. Restore parts to their normal position as instructed. Perform one brief, safe check. Note what changed after each task; if the fault remains, give a technician the model and a photo of the symptom.
Expected result: The symptom has stopped or you have clear notes for a technician.
About 3 min
Stop if: The carrier handles PIN/PUK locks and activation. Have a damaged tray or reader assessed by service.
When should you call a professional?
The carrier handles PIN/PUK locks and activation. Have a damaged tray or reader assessed by service.
Does your situation look different?
Take a photo — FIXIT will assess your fault and suggest checks for your situation.
Check your problemThis guide is for information only. If unsure, get professional help. In an emergency, call 112.