Phone — camera photos look hazy
Check camera glass and the case before changing settings.
Difficulty
Easy
Time
5–25 min
Cost
—
Symptoms
- hazy camera image
Possible causes
1Residue on external camera glass
Less likelyThis is a possible explanation, not a confirmed diagnosis. Compare it with the safe checks below.
- Photograph a well-lit still object with front and rear cameras. Inspect glass and the case edge without opening the phone.
Initial checks
- Photograph a well-lit still object with front and rear cameras. Inspect glass and the case edge without opening the phone.
- Disconnect charging. Wipe glass with a soft lint-free cloth as instructed. Keep liquid out of gaps and do not use polishing paste.
- Repeat in the same lighting without touching the glass. If the case obstructs the camera, try once without it.
Step-by-step repair instructions
- 1
Prepare a safe place
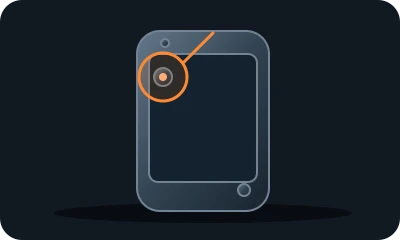
Reference diagram. The marker shows an example inspection area. Follow your model's manual. 
Conceptual illustration. Follow the text and your model's manual. Find the manual and model identifier. Photograph the initial condition. Start with reversible checks that do not open the casing or require force.
Expected result: You understand the model instructions and can safely perform the listed tasks.
About 3 min
Stop if: The model, access or safe preparation is unclear.
- 2
Compare cameras
Reference diagram. The marker shows an example inspection area. Follow your model's manual. Conceptual illustration. Follow the text and your model's manual. Photograph a well-lit still object with front and rear cameras. Inspect glass and the case edge without opening the phone.
Expected result: You know which camera is affected.
About 4 min
Stop if: Glass is cracked or moisture is beneath it.
- 3
Clean the glass
Reference diagram. The marker shows an example inspection area. Follow your model's manual. 
Conceptual illustration. Follow the text and your model's manual. Disconnect charging. Wipe glass with a soft lint-free cloth as instructed. Keep liquid out of gaps and do not use polishing paste.
Expected result: No greasy film remains.
About 4 min
Stop if: Coating peels or glass is loose.
- 4
Compare the result
Reference diagram. The marker shows an example inspection area. Follow your model's manual. Conceptual illustration. Follow the text and your model's manual. Repeat in the same lighting without touching the glass. If the case obstructs the camera, try once without it.
Expected result: Sharpness or contrast improves.
About 4 min
Stop if: Haze remains inside the camera.
- 5
Check the outcome and save your notes
Reference diagram. The marker shows an example inspection area. Follow your model's manual. 
Conceptual illustration. Follow the text and your model's manual. Restore parts to their normal position as instructed. Perform one brief, safe check. Note what changed after each task; if the fault remains, give a technician the model and a photo of the symptom.
Expected result: The symptom has stopped or you have clear notes for a technician.
About 3 min
Stop if: Internal moisture, damaged glass or persistent focus failure requires service.
When should you call a professional?
Internal moisture, damaged glass or persistent focus failure requires service.
Does your situation look different?
Take a photo — FIXIT will assess your fault and suggest checks for your situation.
Check your problemThis guide is for information only. If unsure, get professional help. In an emergency, call 112.