Motorcycle — streaks on mirrors
Clean the surface without disturbing its mounting.
Difficulty
Easy
Time
5–25 min
Cost
—
Symptoms
- mirror reflection is smeared
Possible causes
1Residue or unsuitable cleaner
Less likelyThis is a possible explanation, not a confirmed diagnosis. Compare it with the safe checks below.
- Stop the engine and let surfaces cool. Inspect glass in diffuse light. Do not mistake cracking or delamination for dirt.
Initial checks
- Stop the engine and let surfaces cool. Inspect glass in diffuse light. Do not mistake cracking or delamination for dirt.
- Soften dirt with damp microfibre and use an approved cleaner. Do not scrape grit or flood the pivot.
- Dry with a clean cloth. Sit in the normal position while stopped and check the view. Adjust only as the manual allows.
Step-by-step repair instructions
- 1
Prepare a safe place
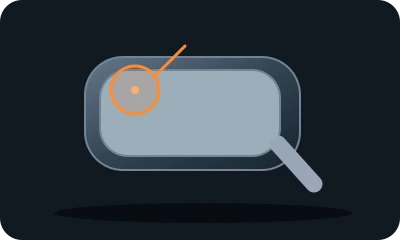
Reference diagram. The marker shows an example inspection area. Follow your model's manual. 
Conceptual illustration. Follow the text and your model's manual. Place the motorcycle securely on level ground, stop the engine and put the key aside. Do not work in traffic or near hot parts.
Expected result: You understand the model instructions and can safely perform the listed tasks.
About 3 min
Stop if: The model, access or safe preparation is unclear.
- 2
Secure the motorcycle
Reference diagram. The marker shows an example inspection area. Follow your model's manual. Conceptual illustration. Follow the text and your model's manual. Stop the engine and let surfaces cool. Inspect glass in diffuse light. Do not mistake cracking or delamination for dirt.
Expected result: You know whether the glass is intact.
About 4 min
Stop if: Glass is cracked or the housing is loose.
- 3
Remove residue gently
Reference diagram. The marker shows an example inspection area. Follow your model's manual. 
Conceptual illustration. Follow the text and your model's manual. Soften dirt with damp microfibre and use an approved cleaner. Do not scrape grit or flood the pivot.
Expected result: Residue lifts without scratching.
About 4 min
Stop if: The coating lifts during cleaning.
- 4
Check visibility
Reference diagram. The marker shows an example inspection area. Follow your model's manual. 
Conceptual illustration. Follow the text and your model's manual. Dry with a clean cloth. Sit in the normal position while stopped and check the view. Adjust only as the manual allows.
Expected result: The reflection is clear.
About 4 min
Stop if: The coating peels or the mirror moves.
- 5
Check the outcome and save your notes
Reference diagram. The marker shows an example inspection area. Follow your model's manual. Conceptual illustration. Follow the text and your model's manual. Restore parts to their normal position as instructed. Perform one brief, safe check. Note what changed after each task; if the fault remains, give a technician the model and a photo of the symptom.
Expected result: The symptom has stopped or you have clear notes for a technician.
About 3 min
Stop if: Damaged glass or mounting requires service before riding.
When should you call a professional?
Damaged glass or mounting requires service before riding.
Does your situation look different?
Take a photo — FIXIT will assess your fault and suggest checks for your situation.
Check your problemThis guide is for information only. If unsure, get professional help. In an emergency, call 112.